Watercress Cultivation Guide: Tips for Growing Success
Welcome to our watercress cultivation guide, where we will explore the techniques and strategies for successful watercress farming. In this section, we will provide a brief introduction to watercress, its growth stages, and the farming techniques involved in cultivating it.
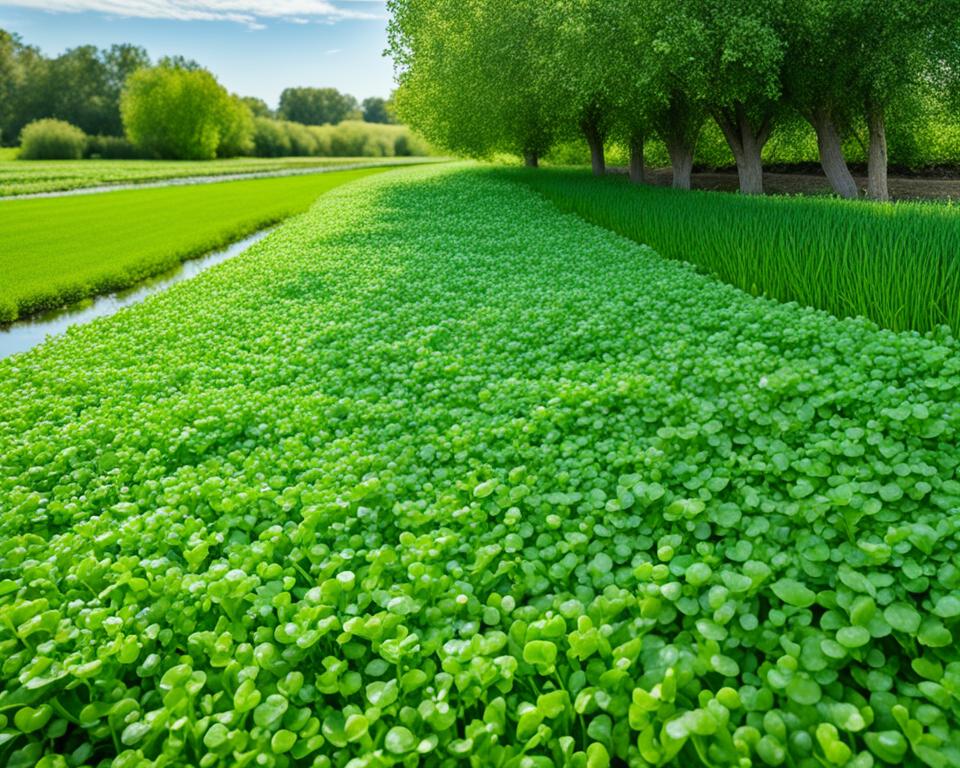
Watercress (Nasturtium officinale) is a leafy green vegetable known for its peppery taste and nutrient-rich profile. It is a member of the Brassicaceae family and is often grown in aquatic or semi-aquatic environments.
Watercress goes through several growth stages from seed to maturity. Understanding these stages is crucial for effectively managing the crop and maximizing harvest yields. The different stages include:
- Germination: This stage occurs when the watercress seeds absorb water and begin to sprout. Adequate moisture, temperature, and oxygen levels are necessary for successful germination.
- Seedling: Once the seeds have germinated, they develop into seedlings with their first true leaves. During this stage, seedlings require careful monitoring and proper nutrition to ensure healthy growth.
- Vegetative Growth: This stage is characterized by rapid leaf development and the establishment of a dense foliage canopy. Watercress plants grow vigorously during this stage, and maintaining optimal growing conditions is essential.
- Flowering: As the plants mature, they enter the flowering stage. At this point, the focus shifts from leaf production to the development of flowers and seeds. Pinching off flower buds can help prolong the vegetative growth phase.
- Seed Production: Once the flowers have been pollinated, they produce seeds that can be harvested for future plantings. Allowing a portion of the crop to go to seed ensures a continuous supply of watercress.
Now that we have an understanding of the growth stages, let’s delve into the essential techniques for successful watercress farming. These techniques include:
- Choosing the right watercress variety based on your specific growing conditions and market demand.
- Providing ideal conditions such as the right temperature, sunlight, soil type, and water quality.
- Preparing the soil and the growing area to create a suitable environment for watercress.
- Deciding whether to plant watercress from seeds or use transplants.
- Implementing proper watering techniques to ensure adequate hydration without overwatering.
- Applying fertilizers and providing the necessary nutrients for optimal plant growth.
- Managing weeds to prevent competition and maintain watercress health.
- Implementing pest and disease control strategies to protect the crop.
- Regularly maintaining and monitoring watercress plants to address any issues promptly.
- Harvesting watercress at the right time for the best flavor and yield.
- Exploring techniques for extending the watercress growing season, such as using cold frames or hydroponic systems.
- Troubleshooting common problems that may arise during watercress cultivation.
As we progress through this guide, we will dive deeper into each of these techniques and provide you with practical tips and advice to help you achieve growing success with watercress. Stay tuned for the upcoming sections where we will explore each aspect in detail.
Read interesting things at : tosawakan
Selecting the Ideal Watercress Variety
When it comes to growing watercress, selecting the right variety is crucial for a successful harvest. With various watercress farming techniques available, choosing the ideal watercress variety can make a significant difference in the plant’s growth and productivity. Here, we explore the different watercress varieties, their characteristics, and factors to consider when making your selection.
Watercress Varieties
There are several watercress varieties to choose from, each with its unique characteristics and growth requirements. Some popular watercress varieties include:
- Nasturtium officinale: This is the most common variety of watercress, known for its rich and peppery flavor.
- Rorippa nasturtium-aquaticum: Also known as true watercress, this variety is often grown in aquatic settings and has a milder taste compared to other types.
- Rorippa microphylla: This native Australian variety is ideal for warmer climates and has smaller leaves with an intense flavor.
When selecting a watercress variety, consider factors such as taste preferences, climate conditions, and the intended use of the harvested watercress.
Factors to Consider
Here are some factors to consider when choosing the ideal watercress variety:
- Growing Conditions: Different watercress varieties thrive in specific climate conditions. Consider the temperature, sunlight exposure, and water quality requirements of each variety.
- Flavor Profile: Each watercress variety has a unique taste. Some varieties offer a bold and peppery flavor, while others have a milder taste. Choose a variety that aligns with your flavor preferences.
- Intended Use: Whether you plan to use the watercress for salads, soups, or garnishes, consider the culinary qualities of each variety. Some varieties may be more suitable for specific culinary applications.
By carefully considering these factors and researching the different watercress varieties available, you can choose the ideal variety that aligns with your growing conditions and desired flavors, setting the stage for a successful watercress harvest.
Ideal Conditions for Watercress Cultivation
Watercress is a delicate aquatic plant that thrives in certain ideal conditions. As a water-loving plant, it requires specific environmental factors to grow and flourish. By understanding and providing these optimal conditions, you can ensure the success of your watercress farming venture.
Temperature
Watercress prefers cool temperatures and grows best in the range of 50°F to 70°F (10°C to 21°C). Extreme heat can cause the plant to bolt or flower prematurely, affecting its flavor and quality. To maintain the ideal temperature, consider planting watercress in shaded areas or providing artificial shade if required.
Sunlight
Although watercress prefers cooler temperatures, it still requires an ample amount of sunlight to thrive. Ideally, it should receive at least four to six hours of direct sunlight daily. If natural sunlight is limited, supplementary artificial lighting can be used to ensure adequate light for proper growth.
Soil Type
Watercress thrives in soil with high organic matter content and a neutral to slightly acidic pH ranging from 6.5 to 7.5. The soil should be well-draining to prevent waterlogging, as the plants can be sensitive to root rot. If your soil is heavy or clayey, consider adding compost or other organic matter to improve its drainage and nutrient-holding capacity.
Water Quality
Since watercress is an aquatic plant, the quality of water used for irrigation is crucial. It requires clean, uncontaminated water with a pH between 6.5 and 7.5. The water source should be free from pollutants, chemicals, and heavy metals that can negatively impact the plant’s health and safety for consumption. If necessary, consider using filtered or treated water for irrigation.
By creating the ideal conditions for watercress cultivation, you can optimize its growth and ensure a bountiful harvest. Paying attention to temperature, sunlight, soil type, and water quality will contribute to the overall success of your watercress farming techniques.
“Watercress is a delicate aquatic plant that thrives in certain ideal conditions. By understanding and providing these optimal conditions, you can ensure the success of your watercress farming venture.”
Preparing the Soil for Watercress Cultivation
Proper soil preparation is essential for successful watercress cultivation. By creating the ideal growing conditions, you can ensure that your watercress plants thrive and produce a bountiful harvest. Follow these steps to prepare the soil for optimal watercress growth:
Selecting the Right Location
Choose a location that provides partial shade to protect your watercress plants from extreme heat. Additionally, ensure that the area has access to a reliable water source, as watercress requires constant moisture for healthy growth.
Soil Testing and Analysis
Before planting, it is important to conduct a soil test to determine the pH level and nutrient content of the soil. Watercress thrives in slightly acidic to neutral soil, with a pH range of 6.0 to 7.5. Adjust the pH level if necessary by adding organic matter or suitable soil amendments.
Loosening and Amending the Soil
Watercress prefers a soil that is rich in organic matter and well-draining. Begin by removing any weeds or debris from the planting area. Use a garden fork or tiller to loosen the soil to a depth of 8 to 10 inches. Incorporate compost or well-rotted manure into the soil to improve its organic content and enhance its ability to retain moisture.
Tip: Avoid using chemical fertilizers or pesticides that could harm the delicate watercress plants and contaminate the water source.
Creating Raised Beds or Containers
Consider creating raised beds or using water containers for the best results in watercress farming. This method allows for better water retention and control while preventing soil erosion. Ensure that the beds or containers are at least 6 inches deep, providing enough space for the watercress roots to develop.
By following these soil preparation techniques, you can create the ideal conditions for watercress cultivation. The next section will guide you through the process of planting watercress, whether you choose to start from seeds or use transplants.
Planting Watercress: Seeds vs. Transplants
When it comes to cultivating watercress, there are two primary methods for starting your plants: planting from seeds or using transplants. Each method has its advantages and considerations, allowing you to choose the approach that best suits your needs and preferences.
Planting Watercress from Seeds
Starting watercress from seeds offers a cost-effective and accessible way to grow this nutritious green. Here are the steps to follow:
- Select healthy watercress seeds from a reputable supplier. Ensure they are fresh and viable for optimal germination.
- Prepare a seedbed in a shady location with rich, moist soil. Watercress thrives in consistently moist conditions.
- Sow the seeds in shallow rows or broadcast them across the seedbed. Aim for a spacing of approximately 6-12 inches between the rows.
- Lightly cover the seeds with a thin layer of soil and gently water the area to keep the soil consistently moist.
- Germination typically occurs within 7-14 days. Keep the soil moist but not waterlogged during this period.
- Once the watercress seedlings have developed true leaves and are approximately 3 inches tall, thin them to a spacing of 4-6 inches to allow for proper growth.
While planting watercress from seeds requires patience and careful attention to moisture levels, it allows you to have complete control over the entire growth process.
Using Watercress Transplants
If you prefer a quicker and more convenient approach, using watercress transplants can be a viable option. Here’s how to do it:
- Purchase healthy watercress transplants from a reputable nursery. Look for plants with vibrant green leaves and well-developed root systems.
- Choose a suitable planting location with partial shade and rich, moist soil.
- Dig holes that are slightly larger than the root ball of each transplant, spacing them approximately 4-6 inches apart.
- Place the watercress transplants in the holes, ensuring that the base of the stem is level with the soil surface.
- Backfill the holes with soil, gently firming it around the transplants to eliminate air pockets.
- Water the newly planted transplants thoroughly to settle the soil and provide them with essential moisture.
Using watercress transplants allows for faster establishment and minimizes the time and effort required to start the plants from seed. It’s a great option if you want to jumpstart your watercress cultivation.
Remember, whether you choose to plant watercress from seeds or use transplants, the key to successful cultivation lies in providing the ideal growing conditions, including ample moisture, partial shade, and nutrient-rich soil.
Proper Watering Techniques for Watercress
Watering is an essential aspect of watercress cultivation, as it directly affects the plant’s growth and overall health. Understanding the proper watering techniques is key to ensuring robust watercress plants that yield a bountiful harvest. In this section, we will explore the watering requirements of watercress plants, including frequency, duration, and watering methods.
Watercress is a semi-aquatic plant that thrives in moist conditions. It requires consistent moisture to support its vigorous growth and development. To maintain the ideal moisture levels, watercress plants should be irrigated regularly.
The frequency of watering watercress plants:
Watercress plants should be watered frequently to keep the soil consistently moist. On average, watercress plants require watering every 1-2 days, depending on prevailing weather conditions. During hot and dry periods, more frequent watering may be necessary to prevent the soil from drying out.
The duration of watering sessions:
When watering watercress plants, it is important to ensure thorough saturation of the soil. Allow water to penetrate deeply, reaching the roots of the plants. A general guideline is to water for approximately 10-15 minutes per session. However, it is crucial to monitor the soil’s moisture levels and adjust the duration accordingly to prevent overwatering or underwatering.
Watering methods for watercress:
There are various methods for watering watercress plants, including overhead irrigation, drip irrigation, and sub-irrigation. Each method has its advantages, and the choice depends on factors such as the size of the cultivation area, available resources, and personal preference.
Overhead irrigation:
Overhead irrigation involves the use of sprinklers or watering cans to evenly distribute water over the watercress beds. This method is suitable for smaller-scale cultivation and provides good coverage. However, it may result in wet foliage, increasing the risk of disease and fungal infections.
Drip irrigation:
Drip irrigation is a highly efficient method that delivers water directly to the plants’ roots. It involves the use of drip emitters or soaker hoses that release water slowly and directly onto the soil surface. Drip irrigation minimizes water wastage and avoids wetting foliage, reducing the risk of diseases.
Sub-irrigation:
In sub-irrigation, also known as bottom watering, water is supplied to the watercress plants from below. This method utilizes a tray or container filled with water where the plants take up moisture through their roots. It is suitable for small-scale cultivation and provides consistent and controlled moisture levels.
| Watering Technique | Advantages | Disadvantages |
|---|---|---|
| Overhead Irrigation | Provides good coverage | May increase the risk of disease |
| Drip Irrigation | Efficient water usage, avoids wetting foliage | Requires proper installation and maintenance |
| Sub-irrigation | Consistent moisture levels, controlled watering | Suitable for small-scale cultivation only |
Remember, when watering watercress plants, always aim to maintain consistent moisture levels without overwatering. Proper watering techniques are essential for the success of your watercress cultivation, promoting healthy growth and ensuring optimal productivity.
Fertilizing and Feeding Watercress Plants
Proper fertilization plays a crucial role in the successful cultivation of watercress. By providing the essential nutrients, you can ensure optimal growth and productivity of your watercress plants. Here are some important tips on how to fertilize and feed watercress:
1. Choose the Right Fertilizer
When selecting a fertilizer for watercress, it is important to choose one that is rich in nitrogen, phosphorus, and potassium (NPK). These nutrients are essential for promoting healthy leaf growth, strong root development, and overall plant vigor. Look for a balanced NPK ratio such as 10-10-10 or 14-14-14.
2. Apply Fertilizer Sparingly
Watercress is a heavy feeder, but too much fertilizer can lead to excessive leaf growth and poor flavor. Apply the fertilizer sparingly, following the instructions on the packaging. Over-fertilizing can lead to nutrient imbalances and negatively impact the health of your watercress plants.
3. Timing is Key
It is best to apply fertilizer to watercress during the active growing season, which typically occurs in spring and fall. Avoid fertilizing during the summer months when watercress growth slows down. Applying fertilizer at the right time ensures that the plants receive the nutrients when they need them the most.
4. Use Organic Fertilizers
Organic fertilizers are a great option for feeding watercress plants as they provide slow-release nutrients and improve soil health. Composted manure, seaweed extract, and fish emulsion are excellent choices for organic fertilizers. These natural alternatives also enrich the soil with beneficial microorganisms.
5. Apply Fertilizer in Liquid Form
For better nutrient absorption, it is recommended to apply fertilizers in liquid form. Dilute the fertilizer according to the instructions and carefully pour it around the base of the watercress plants. This ensures that the roots receive the nutrients directly for efficient uptake.
6. Monitor Plant Health
Regularly monitor the health of your watercress plants to determine whether they require additional fertilization. Look out for signs of nutrient deficiencies such as yellowing leaves or stunted growth. Adjust the fertilization schedule accordingly to address any nutrient imbalances.
7. Avoid Overwatering
Overwatering can leach out essential nutrients from the soil, reducing the effectiveness of fertilization. Ensure that the watercress beds have proper drainage to prevent waterlogged conditions. Only water the plants when the top inch of the soil feels dry.
Fertilizing and feeding your watercress plants properly is essential for their growth and productivity. By following these tips, you can provide the necessary nutrients and ensure healthy, flavorful watercress harvests.
| Fertilizer Type | Nutrient Content (%) | Benefits |
|---|---|---|
| 10-10-10 | 10% nitrogen, 10% phosphorus, 10% potassium | Provides balanced nutrition for watercress |
| 14-14-14 | 14% nitrogen, 14% phosphorus, 14% potassium | Promotes strong root development and leaf growth |
| Composted Manure | Varies based on source | Improves soil fertility and structure |
| Seaweed Extract | Varies based on brand | Rich in trace minerals and beneficial plant hormones |
| Fish Emulsion | Varies based on brand | Provides organic nutrients and enhances soil microbial activity |
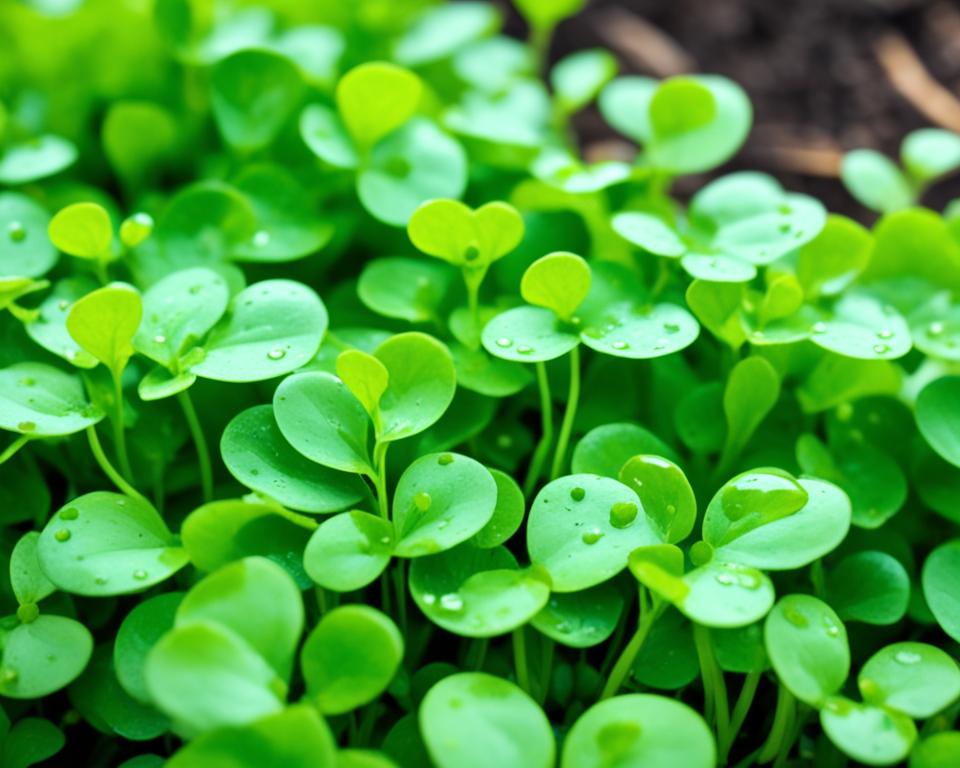
Weed Management Strategies for Watercress Cultivation
When it comes to watercress farming techniques, effective weed management is crucial to ensure the health and productivity of your watercress beds. Weeds can compete with watercress for essential nutrients, light, and water, hindering its growth and overall quality. To maintain optimal growing conditions and maximize yields, implementing the right weed control strategies is essential.
One of the most effective ways to control weeds in watercress beds is through regular manual removal. By physically pulling out weeds by hand or using a handheld weeder, you can prevent them from overpowering your watercress crop. This method allows for targeted weed removal without causing damage to the watercress plants and is especially useful for small-scale cultivation.
Another method for weed management in watercress farming is the use of mulch. Applying a layer of organic mulch, such as straw or wood chips, around the base of the watercress plants helps to suppress weed growth by blocking sunlight from reaching the weed seeds. Additionally, organic mulch breaks down over time, adding nutrients to the soil and improving overall soil health.
For larger-scale watercress farming operations, the use of herbicides may be necessary for effective weed control. Selective herbicides specifically formulated for watercress can be applied carefully to target weeds while minimizing damage to the watercress plants. It is essential to follow the instructions provided by the herbicide manufacturer and adhere to safety guidelines and regulations when using chemical weed control methods.
“Proper weed management is essential for watercress farming success. By implementing manual removal, mulching, or herbicide application, you can prevent weed competition and ensure the health and productivity of your watercress beds.”
In addition to these strategies, regular monitoring of your watercress beds is essential. By promptly addressing any emerging weed growth, you can prevent weeds from spreading and maintain the integrity of your crops. It is also helpful to keep the surrounding areas clean and free from weeds, as they can serve as a source of weed seeds that can eventually infiltrate your watercress beds.
Remember to implement weed management strategies that align with organic or sustainable practices, depending on your farming philosophy and market preferences. Sustainable weed control methods, such as manual removal and organic mulching, may be preferred by consumers seeking environmentally friendly produce.
By incorporating these weed management strategies into your watercress farming techniques, you can maintain a healthy and vibrant watercress crop, free from the competition and negative impact of weeds.
| Weed Management Strategies | Benefits | Considerations |
|---|---|---|
| Manual Removal | – Allows for targeted weed control – Minimizes damage to watercress plants |
– Time-consuming for larger-scale operations |
| Mulching | – Suppresses weed growth – Improves soil health |
– Requires regular replenishment – May attract pests |
| Herbicide Application | – Effective for large-scale operations – Targeted weed control |
– Follow safety guidelines and regulations – Potential environmental impact |
Pest and Disease Control for Watercress
Watercress farming techniques require careful attention to pest and disease control to maintain healthy plants and achieve successful cultivation. In this section, we will discuss common pests and diseases that can affect watercress and provide strategies for prevention and control.
Common Pests in Watercress
Watercress can be susceptible to various pests that can hinder its growth and productivity. Some of the common pests that watercress farmers encounter include:
- Aphids
- Leaf miners
- Slugs and snails
- Whiteflies
To prevent and control these pests, it is important to implement effective pest management strategies. Regular monitoring of the watercress beds is essential to detect pest infestations at an early stage.
Prevention and Control Methods
Implementing integrated pest management techniques can help keep pest populations in check and reduce the need for chemical interventions. Here are some strategies to consider:
- Encourage natural predators: Introduce beneficial insects such as ladybugs and lacewings that feed on pests like aphids and whiteflies.
- Use physical barriers: Install floating row covers or erect wire mesh fences to protect watercress beds from slugs and snails.
- Handpick pests: Regularly inspect and manually remove pests like slugs and snails to prevent their population from escalating.
- Cultural practices: Practice crop rotation and maintain proper plant spacing to reduce the risk of pest infestations.
- Organic insecticides: Consider using organic insecticides approved for use in watercress farming to control severe pest outbreaks.
Common Diseases in Watercress
Watercress can also be susceptible to certain diseases that can affect its overall health and yield. Some common diseases in watercress cultivation include:
- Downy mildew
- Bacterial spot
- Root rot
- White rust
It is crucial to identify and address these diseases promptly to prevent their spread and minimize damage to the watercress crop.
Disease Prevention and Control
Applying preventive measures and practicing good crop management techniques can help mitigate the risk of diseases in watercress. Here are some strategies to consider:
- Plant disease-resistant varieties: Choose watercress varieties that are known to be resistant to common diseases in your region.
- Maintain good sanitation: Regularly remove infected plant debris and maintain clean growing areas to prevent disease spread.
- Monitor irrigation practices: Avoid overwatering, as excessive moisture can promote disease development.
- Apply appropriate fungicides: In severe cases, consider using fungicides approved for watercress cultivation to control disease outbreaks.
Regular Maintenance and Monitoring for Watercress
Regular maintenance and monitoring are key components of successful watercress farming techniques. By implementing these practices, you can ensure the healthy growth and optimal yield of your watercress plants. Here are some essential tasks to include in your maintenance routine:
- Inspecting for Pests and Diseases: Regularly check your watercress plants for any signs of pests or diseases. Look out for common issues such as aphids, caterpillars, and fungal infections. Addressing these problems early on can prevent them from spreading and causing significant damage to your crop.
- Weed Control: Keep a vigilant eye on weed growth in your watercress beds. Weeds can compete with your plants for nutrients, water, and sunlight, hindering their growth. Regularly remove any weeds that appear and implement proper weed management strategies to prevent their recurrence.
- Monitoring Water Levels: Watercress requires consistent access to water for optimal growth. Monitor water levels in your growing area regularly. Ensure that the water flow is appropriate and sufficient to maintain the necessary moisture for your plants.
- Pruning and Thinning: Maintain the health and productivity of your watercress plants by pruning and thinning when necessary. Remove any damaged or diseased foliage, as well as any overcrowded plants or excessive growth. This will promote better air circulation and reduce the risk of disease.
- Monitoring Nutrient Levels: Regularly test the nutrient levels in your watercress growing area. Ensure that the soil or water contains an adequate supply of nutrients essential for plant growth, such as nitrogen, phosphorus, and potassium. Adjust fertilization practices as needed to maintain optimal nutrient balance.
By incorporating these regular maintenance and monitoring tasks into your watercress farming techniques, you can ensure the healthy growth and productivity of your watercress plants throughout their growth stages.
Benefits of Regular Maintenance and Monitoring
Regular maintenance and monitoring provide several benefits in watercress cultivation:
- Prevention of Pest and Disease Outbreaks: By conducting regular inspections, you can detect pests and diseases early and take prompt action to prevent their spread.
- Optimal Plant Health: Pruning, thinning, and removing damaged foliage ensure that your watercress plants remain healthy and productive.
- Efficient Nutrient Management: Monitoring nutrient levels allows you to adjust fertilization practices, ensuring that your plants receive adequate nutrition for optimal growth.
- Weed Control: Regular weed removal and preventive measures minimize weed competition, allowing your watercress plants to thrive.
Regular maintenance and monitoring are essential elements of successful watercress farming techniques. By dedicating time and effort to these tasks, you can enjoy a healthy and bountiful watercress harvest.
| Maintenance Tasks | Benefits | |
|---|---|---|
| 1. | Inspecting for Pests and Diseases | Prevent outbreak and damage |
| 2. | Weed Control | Minimize competition for resources |
| 3. | Monitoring Water Levels | Maintain adequate moisture |
| 4. | Pruning and Thinning | Promote optimal growth and airflow |
| 5. | Monitoring Nutrient Levels | Ensure balanced nutrition |
Harvesting and Using Fresh Watercress
Once your watercress plants have reached maturity, it’s time to harvest them for your culinary endeavors. The process of harvesting watercress is simple and can be done regularly to ensure a fresh and abundant supply of this flavorful green.
To begin, use a pair of sharp scissors or garden shears to cut the watercress stems just above the waterline. This prevents any potential water contamination and allows for new growth. Harvest the mature leaves and stems, leaving behind the younger plants to continue growing.
It’s best to harvest watercress in the morning when the leaves are crisp and at their peak flavor. Avoid harvesting in the heat of the day, as the leaves can wilt quickly.
When using fresh watercress in your culinary creations, consider these tips:
- Salads: Toss rinsed watercress leaves into salads for a peppery kick and a vibrant burst of freshness.
- Sandwiches: Add a layer of watercress to your sandwiches for an added crunch and a unique flavor profile.
- Green Smoothies: Blend fresh watercress with other fruits and vegetables to create a nutritious and refreshing green smoothie.
- Soups and Stews: Add watercress leaves to soups and stews during the last few minutes of cooking to retain their bright green color and add a delicate flavor.
- Herb Pesto: Combine watercress with other herbs, nuts, garlic, and olive oil to create a vibrant and flavorful pesto sauce.
Recipe: Watercress and Avocado Salad
Try this delicious and nutritious watercress and avocado salad for a refreshing side dish:
“Watercress and Avocado Salad”
Serves: 2
Ingredients:
| Ingredients | Amount |
|---|---|
| Watercress leaves | 2 cups |
| Avocado | 1, sliced |
| Cherry tomatoes | 1 cup, halved |
| Red onion | 1/4 cup, thinly sliced |
| Lemon juice | 1 tablespoon |
| Extra virgin olive oil | 2 tablespoons |
| Salt | To taste |
| Black pepper | To taste |
Instructions:
- In a large bowl, combine the watercress leaves, avocado slices, cherry tomatoes, and red onion.
- In a separate small bowl, whisk together the lemon juice, extra virgin olive oil, salt, and black pepper to make the dressing.
- Pour the dressing over the salad and toss gently to coat all the ingredients.
- Divide the salad into individual plates and serve immediately.
Enjoy the crisp and peppery flavor of watercress combined with the creaminess of avocado in this delightful salad!
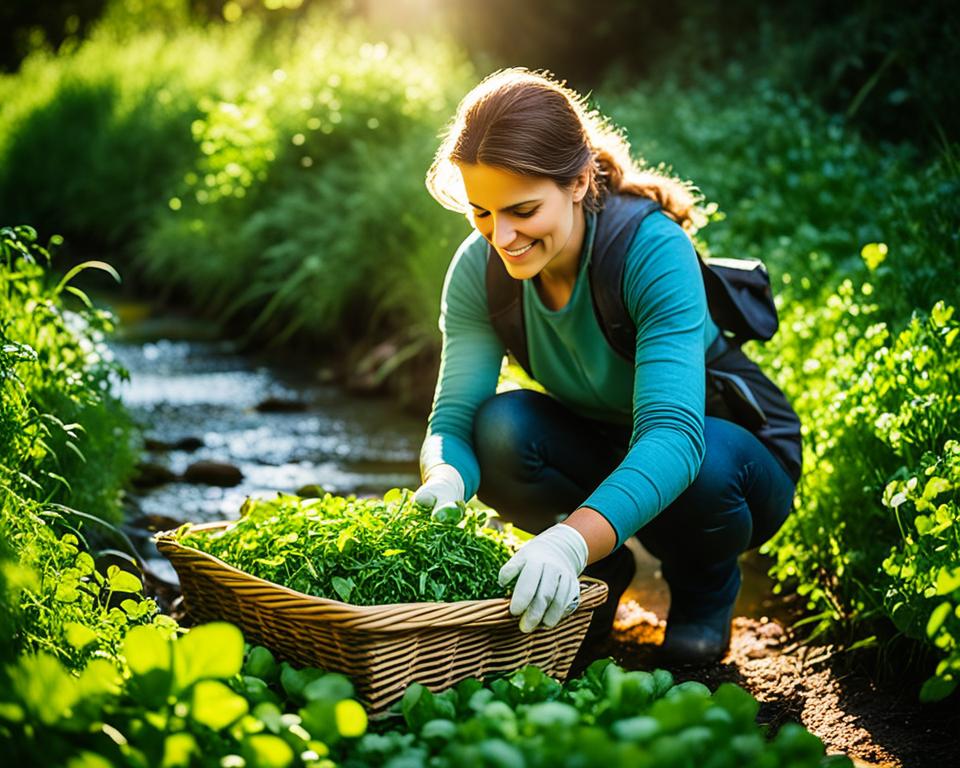
Remember, by harvesting watercress properly and incorporating it into your culinary repertoire, you can fully enjoy the fresh and nutritious benefits of this versatile green.
Extending the Harvest: Year-Round Watercress Cultivation
Watercress is a versatile and nutritious leafy green that can be enjoyed throughout the year. While it is typically associated with cooler climates, there are techniques that allow for year-round cultivation, ensuring a steady supply of fresh watercress regardless of the season. In this section, we will explore some effective methods to extend the harvest and optimize watercress farming techniques.
Using Cold Frames
One technique for year-round watercress cultivation is the use of cold frames. Cold frames are essentially small, enclosed structures that provide a controlled environment for plants. They act as mini-greenhouses, capturing heat from the sun and protecting watercress plants from frost and chilly temperatures.
To create a cold frame, start by constructing a box-like structure using wood or other materials. Cover the frame with a transparent material, such as greenhouse plastic or glass, to allow sunlight to penetrate. Place the cold frame in a location that receives ample sunlight, preferably facing south.
During the colder months, keep the cold frame closed to trap heat inside and maintain a favorable temperature for watercress growth. Open the frame during warmer periods to prevent overheating and provide ventilation.
Utilizing Row Covers
Row covers are another useful tool for extending the watercress growing season. These covers are made of lightweight, breathable fabric that can be placed directly over the watercress bed. Row covers help create a microclimate that insulates plants and protects them from frost, while still allowing air, water, and light to reach the crops.
To use row covers, simply drape the fabric over the watercress bed and secure it to the edges of the growing area. It is essential to choose a fabric with the appropriate weight and thickness to ensure adequate insulation without suffocating the plants.
Exploring Hydroponic Systems
Hydroponic systems offer an innovative approach to year-round watercress cultivation. These systems allow plants to grow in a nutrient-rich water solution instead of traditional soil. By controlling the water, nutrient levels, and light exposure, hydroponic systems provide ideal conditions for watercress growth, ensuring consistent harvest throughout the year.
There are various types of hydroponic systems, such as nutrient film technique (NFT) and deep water culture (DWC), each with its own advantages and requirements. Consider researching and selecting a hydroponic system that suits your resources and preferences.
By implementing these techniques, watercress farmers can enjoy a continuous harvest and provide fresh, flavorful watercress to consumers year-round. Whether using cold frames, row covers, or hydroponic systems, these methods offer effective solutions for extending the watercress growing season and maximizing crop yield.
Common Problems and Solutions in Watercress Cultivation
Watercress farming techniques require careful attention to detail and proactive problem-solving. Despite best efforts, certain issues may arise during cultivation. This section aims to address common problems faced by watercress farmers and provide effective solutions to mitigate their impact.
Poor Germination
Poor germination is a disappointing setback that can delay the growth of watercress plants. It can occur due to factors such as incorrect temperature, inadequate moisture, or poor seed quality. To improve germination rates:
- Ensure the seeds are fresh and of high quality.
- Keep the soil consistently moist but not waterlogged.
- Maintain a temperature between 50°F and 70°F (10°C – 21°C) for optimal germination.
Weed Competition
Weeds can pose a significant challenge to watercress growth by competing for nutrients, sunlight, and space. To effectively manage weeds:
- Regularly hand-pull weeds from watercress beds, taking care not to disturb the delicate plants.
- Apply a layer of organic mulch to suppress weed growth and retain soil moisture.
Pest Infestations
Pests such as aphids, snails, and slugs are known to attack watercress plants and cause damage. Implement the following pest control methods:
Encourage natural predators like ladybugs and lacewings by incorporating native plants into the watercress garden.
Set up copper barriers or traps to deter slugs and snails.
Use organic insecticides sparingly and according to the product instructions.
Disease Outbreaks
Watercress is susceptible to diseases such as downy mildew and bacterial leaf spot. To prevent and manage disease outbreaks:
- Provide adequate airflow around plants by thinning overcrowded seedlings.
- Water the plants at the base to avoid wetting the foliage excessively.
- Remove and dispose of diseased plants promptly to prevent the spread of pathogens.
By addressing these common problems promptly and implementing proactive solutions, watercress farmers can optimize their cultivation processes and ensure a successful harvest.
Conclusion
Congratulations on completing this comprehensive watercress cultivation guide! By following the best tips for growing watercress, you are well-equipped to embark on a successful journey in watercress farming.
Throughout this article, we have covered various aspects of watercress cultivation, including selecting the ideal variety, creating optimal growing conditions, preparing the soil, planting techniques, proper watering and fertilizing, weed and pest management, and harvesting methods.
Remember, growing watercress requires attention to detail and consistent maintenance. By implementing the strategies discussed here, you can ensure the healthy growth and productivity of your watercress plants.
Whether you are a seasoned farmer or a novice gardener, these valuable tips will serve as a guide to achieve success in watercress cultivation. Happy growing!
